Fix: “An error occurred while windows was synchronizing with time.windows.com”
Automatic clock synchronization was part of Windows for many years, and this attribute can be found in Windows 10. Alas, few users have some difficulties using clock synchronization and they're reporting An error occurred while windows have been synchronizing with time.windows.com error message.
Option 1: Check if Windows Time service is currently operating
Time synchronization feature is based heavily on Windows Time service, and when Windows Time service is not running, you may experience this error. To Repair This Issue, You Have to alter Windows Time service settings by following these steps:
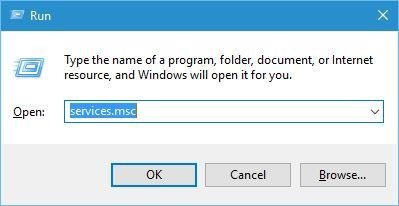
1. Press Windows Key + R and input services.msc. Press Input or click on OK.
2. When Services window opens, find Windows Time support and double-click it to open its properties.
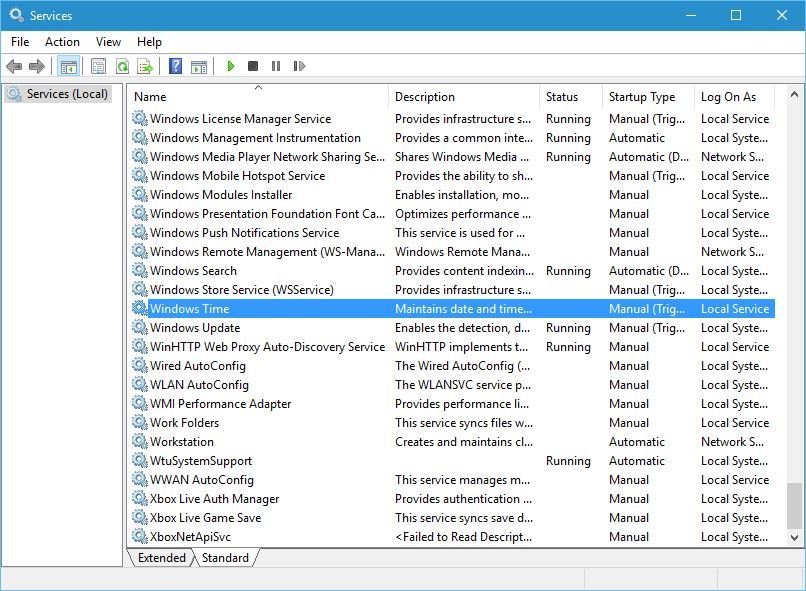
3. Establish Startup kind into Automatic and click on the Start button to begin Windows Time Support.
4. After doing this, click Employ and OK to store changes.

Option 2: Use another server
Users reported they were able to correct this issue by simply employing another server. To change the synchronization server, do the following:
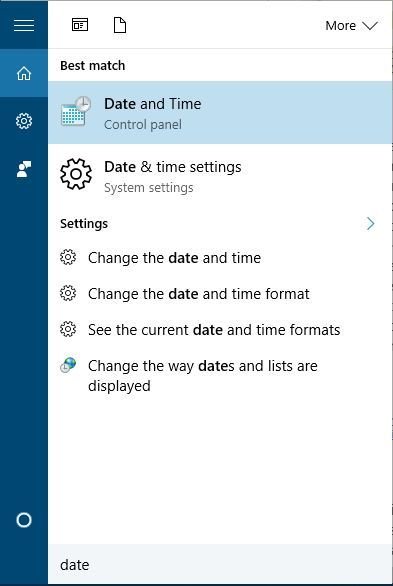
1. Press Windows Key + S and input a date. Select Date and Time in the menu.
2. When Services window opens, find Windows Time support and double-click it to open its properties.
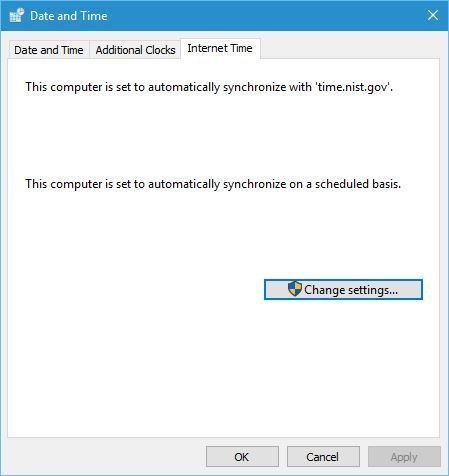
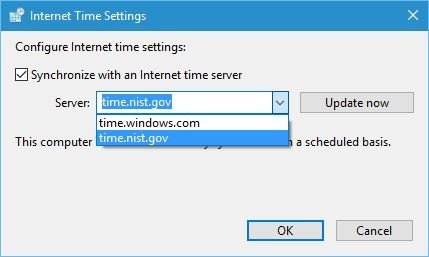
3. Select time.nist.gov as the Server and click on the Update currently button. Some users reported that utilizing pool.ntp.org since the host fixes this issue, so that you may try out using it also.
4. Click OK to store changes.
There are various time servers which you could use, and a few of these aretime-a. nist.gov, time-b. nist.gov, time-a. Timefreq.bldrdoc.gov, also time-b. timefreq.bldrdoc.gov. Before attempting this option, be sure that Windows Time service is set to Automatic and functioning. For detailed instructions about how to do this, make sure you take a peek at our previous alternative.
Option 3: Perform Windows Time service
To be able to repair this problem, you may need to restart Windows Time service. To do so, start the Services window and then double-click the Windows Time support to open its attributes. If the service is running, stop it. Establish the Startup Form into Automatic and Begin the service . Click Apply and OK to save changes and restart your PC.
Some customers are also proposing to modify Log On preferences of Windows Time service prior to implementing adjustments and restarting your PC. To do that, follow these steps:
1. Visit Services and start Windows Time service possessions.
2. Visit Log On tab and Choose Local System account alternative. Assess Allow service to interact with the background alternative.
3. After this, click Employ and OK and restart your PC.
Remember you will need to do this step directly after restarting the Windows Time service.
